
Newbies’ Guide to CX: DIY Cyclocross Barriers in 6 Easy Steps
Of all the aspects of cyclocross racing, possibly the most different from other forms of cycling - and the most daunting for new participants - are the barriers. These hurdles (most commonly made of wood) are up to 40cm high, and unless you’re a particularly proficient bunnyhopper, will require you to dismount and run with your bike to clear them before remounting on the other side.
Most seasoned ‘crossers can recall at least one mishap over a set of barriers (myself included), and if you come in really hot, your mistake might end up looking like this:
Evidently, practicing on wooden barriers doesn’t leave much margin for error, which can be especially daunting when you’re just starting out.
That’s why we made our own set of portable barriers made of PVC pipe. They’re ideal for beginners, can be set up either in a low (20cm) or high (40cm) configuration depending on your training needs, and pack down small enough to be transported in a backpack. Why not have your own set to practice on?
Here’s our quick and easy 6-step guide to making your own set of CX barriers.

1. Head to your local hardware store and pick up the following items:
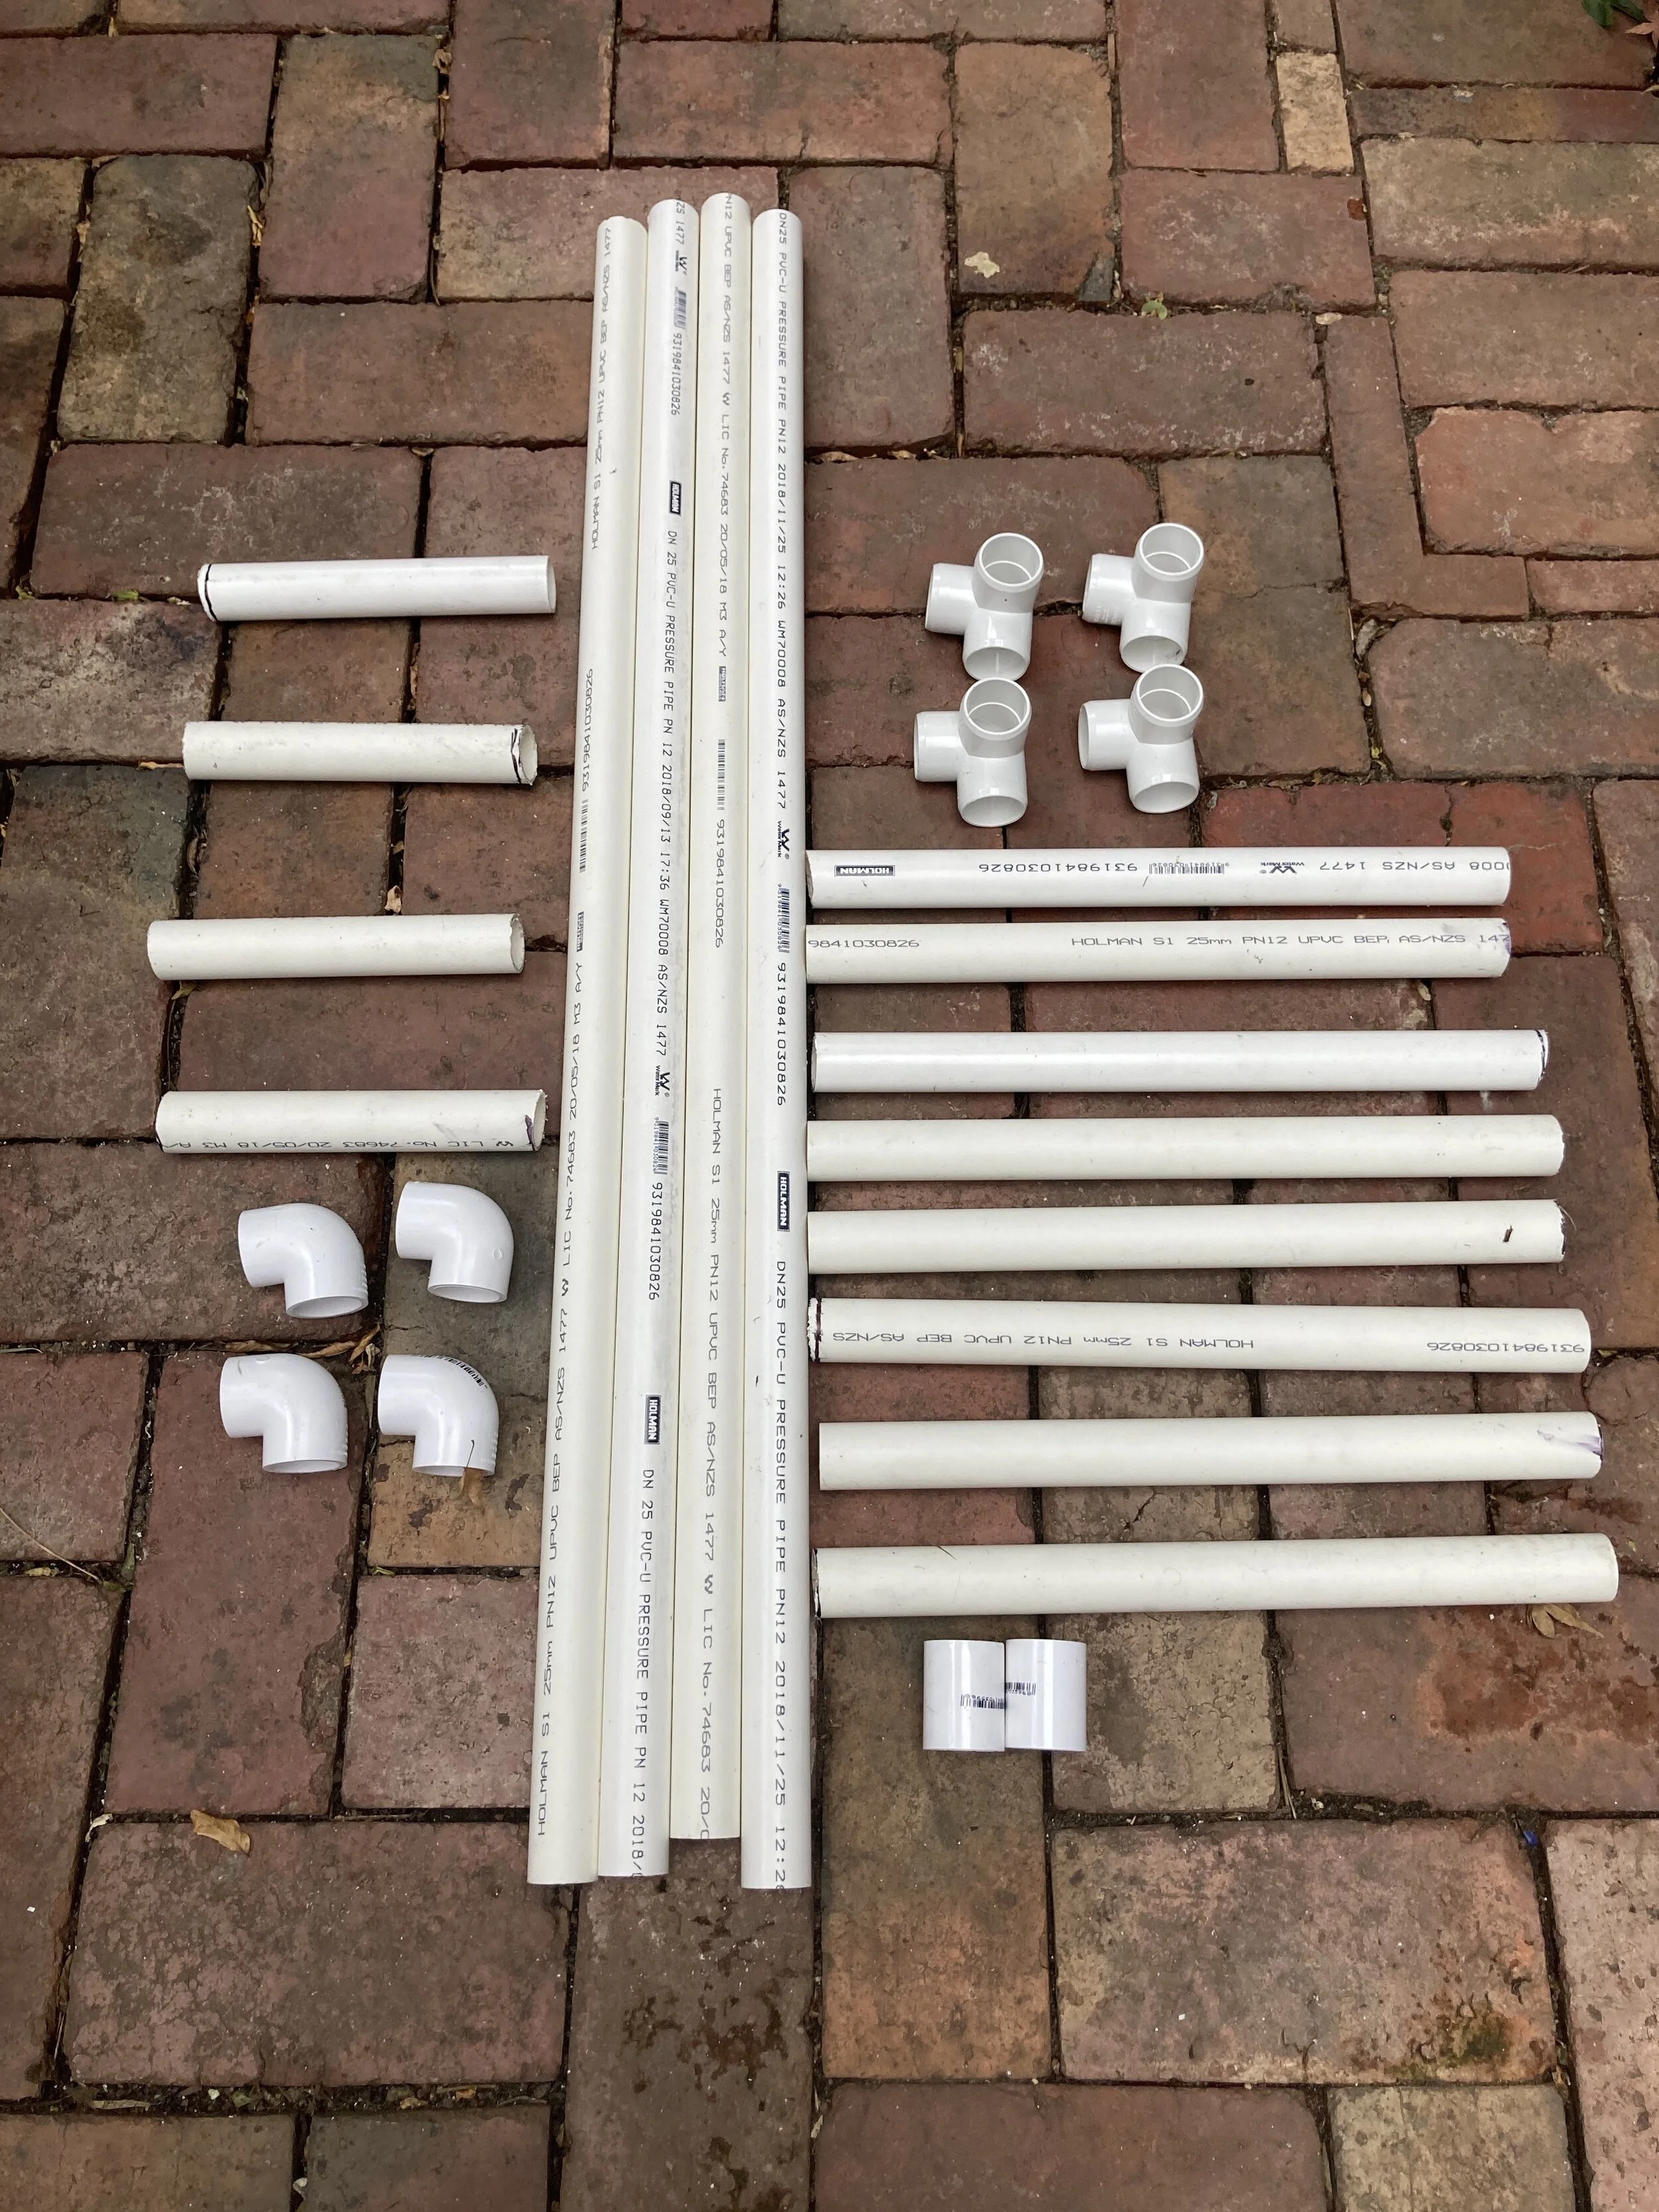
The essentials
6 x 1m lengths of PVC pipe, 25mm diameter (centre)
4 x L-shaped connectors, 25mm diameter (bottom left)
4 x T-shaped connectors or elbow connectors, 25mm diameter (top right)
2 x straight connectors, 25mm diameter (bottom right)
Optional extras
A hacksaw (if you don’t already have one)
Duct tape in different colours
2. Head home and cut four of your six 1m lengths of PVC pipe into lengths measuring 40cm, 40cm and 20cm for each 1m piece. Don’t worry if your measurements aren’t exact - these lengths will be plugged into connectors, so a few mm on either side won’t make much of a difference.

3. Cut your remaining two 1m lengths of straight PVC pipe in half, giving you a total of four lengths of 50cm each.
At this point you should have:
- 50cm piece x 4
- 40cm piece x 8
- 20cm piece x 4
If you want to make it easier between different sized pieces, feel free to colour-code them with some duct tape. -

4. Time to assemble! If you’re just starting out, set them up in the low configuration:
Start by taking two of the 50cm pieces and connecting them with a straight connector. This will be your crossbar. Place an L-shaped connector on each end of the crossbar.
Take a T-shaped connector and insert two 40cm pieces on each side of the T. Place a 20cm piece in the middle part of the T - this will be your vertical piece that determines the height of your barriers. Repeat with another 20cm piece for the other side.
Connect the empty end of your 20cm piece to the L-shaped connector on each side and you’re ready to repeat with the second barrier.

5. Want more of a challenge? Set them up in the high configuration by swapping the position of the 20cm and one of the 40cm pieces on both sides of each barrier.
This trades a bit of stability for some extra height, so you’ll need to be sure you’re working with a fairly flat surface to avoid them tipping over. If some extra sure-footedness is needed, pop an extra length of PVC pipe in the spare port of the T connector.
This high configuration results in a barrier that’s actually slightly higher than the UCI limit of 40cm, meaning that if you can clear this one consistently, there won’t be anything on race day that will faze you.
6. Go practice! Having the straight connector in the middle of the crossbar will give you something to aim at, and will break apart easily if you stuff anything up, giving you plenty of margin for error as you master your skills.


(Note: While CXDU is based in Melbourne, these last two images are from a Dirty Deeds CX clinic that happened pre-pandemic).